
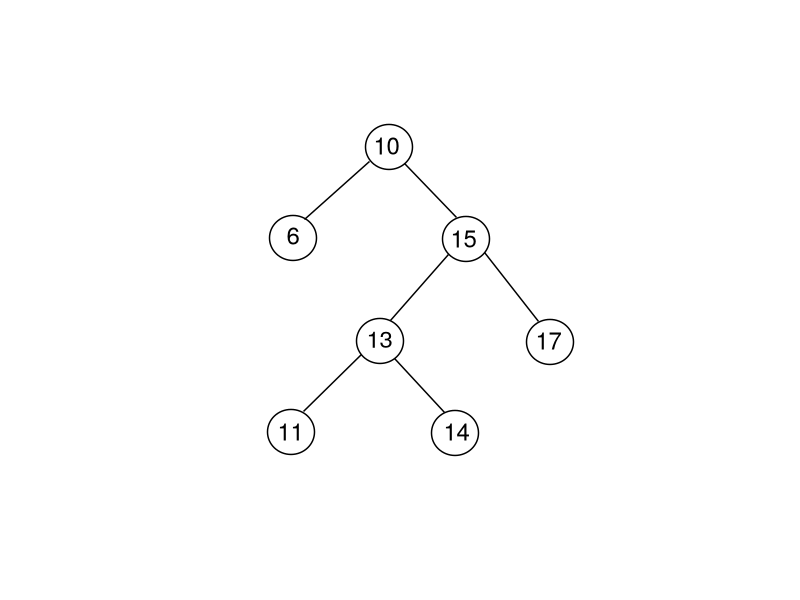
Binary Search Tree is a special type of tree, in which (as the name implies) each node has maximum of two child nodes commonly termed as Left node and Right node. Nodes are placed in a way such that the value of the Left node is always less than or equal to the value of its Root node and the value of the Right node is always greater than or equal to the value of its Root node.
This article focuses on how to implement the Binary Search Tree in JavaScript.
First, let’s implement a node structure. Each node in Binary Search Tree contains four things.
- Its value.
- Reference to Left node.
- Reference to Right node.
- Count of the current value. (Count is introduced keeping in mind that there can be duplicate values. When a duplicate value will be inserted, the count of the node containing that value, will be incremented)
It should be something like this. (Note: we are using ES6 class syntax here)
class Node {
  constructor(value) {
    this.value = value;
    this.count = 1;
    this.left = null;
    his.right = null;
  }
}
Now Let’s implement the Binary Search Tree itself.
class BinarySearchTree {
  constructor() { this.root = null; }
}
The above class defines the structure for Binary Search Tree, initializing a root node, initially as null. Next we will implement some methods in this class in order to support insertion of nodes, deletion of nodes, Pre-order, In-order and Post-order traversals etc.
Inserting New Node:
Inserting a new node in a Binary Search Tree is bit tricky. We need to keep following important points in mind while doing so.
- First we need to check, if the root node of the tree is null, we will store the current node as root. Root node will be null only when the node being inserted is the first node inserted into the tree.
- Second thing we need to check is that if the current node is duplicate. If so, we will just increment the
countvariable of the current node. - If both of the above cases are not satisfied, it means it’s a new node, and we need to check if it falls on the left side of the root node or right side.
- If the value of the current node (node being inserted) is less than that of the root node, then this node should be inserted on the left side of root node.
- What if there is already a left node. In this case we will insert the current node as child of the left node. But again we will need to find right place for it by comparing its value against the left node, which is now the root node. We will use
recursionin order to find the right place for the node being inserted. - In case the value of the current node is higher than that of the current root node, the node will be inserted on the right side of the root node. Same rules will apply for the right node as well, as we did for the left node. If current node is not a
leaf node,we will userecursionto find the correct place for the node to be inserted.
Let’s dive into coding. Our insert function looks something like this
insert(value) {
  const node = new Node(value);
  if (this.root === null)
    this.root = node;
  else
    this.insertNode(this.root, node);
}
First we are checking if the root is null then this is the first node being inserted, so it will become the root node of the tree.
If root is not null, it means this is not the first node, so we have to decide where to insert this new node. We will take this logic into a separate function, and pass the root node and current node being inserted as parameters.
This new function looks like this
insertNode(root, node) {
  if (root.value === node.value) root.count += 1;
  else
    if (node.value < root.value)
      if (root.left === null)
        root.left = node;
      else
        this.insertNode(root.left, node)
    else if (node.value > root.value)
      if (root.right === null)
        root.right = node;
      else
        this.insertNode(root.right, node);
}
Deleting a Node:
In order to delete a node from the Binary Search Tree, we need to keep in mind following things.
- If the node being deleted is the only node in the tree, then it’s simple, just delete it and nothing else to do.
- If the node being deleted has children, then we have to decide, what will happen to those child nodes, if we deleted this node. Of-course the position of the child nodes will be affected by this operation.
- If node has only left child and no right child, then it’s simple, we will just replace the current node by its left child, and all will be okay.
- Similarly, if node has only right child and no left child, just replace the current node by the right child and tree will be fixed.
- In case the node has both right and left children, then it’s bit complicated. The rule here in this case is to find a node, from the child nodes of the current node, which is bigger than current node, but smaller than all other child nodes. Or simply the next big node then the current node. Once we found this node, we will replace the current node with this node and then fix the order of the children nodes (if any).
Let’s write a function in our Binary Search Tree class to do this.
remove(value) {
  let root = this.getRoot();
  if (root === null)
    console.log('Empty tree. No node deleted');
  else
    root = this.removeNode(root, value);
}
Similar to insert function we have broken the remove function into two functions. In above function, we are first getting the root node of the current tree. If the root node is null , that means tree is empty and it has no nodes to delete. If we found the root node, then we call removeNode function and pass the root node and the value of the node to be removed. The removeNode function will find and return the node, which will replace the current root node and fix the order of the tree.
Our removeNode function looks something like below:
removeNode(node, value) {
  if (node.value === value) {
    if (node.count > 1) {
      node.count -= 1;
      return node;
    }
    if (node.left === null && node.right === null) {
      return null;
    }
    if (node.left === null) {
      return node.right;
    }
    if (node.right === null) {
      return node.left;
    }
    const tempNode = node.right;
    while (tempNode.left !== null) {
      tempNode = tempNode.left;
    }
    node.value = tempNode.value;
    node.right = this.removeNode(node.right, tempNode.value);
    return node;
  }
  else if (value < node.value) {
    node.left = this.removeNode(node.left, value); return node;
  }
  else {
    node.right = this.removeNode(node.right, value); return node;
  }
}
In this function we are first checking if this is the node we need to remove, by checking it’s value against the value being provided. first we check if the current value is equal to that of value of the node, it means we have to remove this node.
Then we are checking if current value is incremented already (remember our tree supports duplicate values). If node has duplicates, then we just decrement the value by 1 and return the same node.
If this that’s not the case then we check if the current node has any children, and if not then just simply return null which will delete the node, as we are replacing the node with return value.
If node has only 1 child, either left or right then also its simple replace the current node.
But it gets complicated when the node two children. In this case we are using while loop to find the last most left child, because we know that this node contains the value which is next bigger than the value of current node.
Once we found this node, we replace the current node with this node and call the removeNode function recursively to correct the order of the right sub-tree.
In case the value provided is not equal but is less than the value of the node provided, then we already know that we can find the node holding this value is somewhere in left sub-tree. We recursively call the removeNode function, and pass the left node as parameter.
Else if the the value is higher than that of the current node’s value, it means it lies somewhere in the right sub-tree. In this case also we recursively call the removeNode function and this time we pass the right node.
Once this function stops executing our tree will be in correct order and corresponding node is already removed.
Traversing:
Binary Search Tree can be traversed in three different ways:
- In-order Traversal
- Pre-order Traversal
- Post-order Traversal
These three ways of traversing a Binary Search Tree are called Depth First Traversal.
There is another way to traverse called Breadth First Traversal. Here we will not discuss this method. We will only concentrate on Depth First Traversal.
In our Binary Search Tree class we have defined a function called traverse. This function has two parameters, type of the traversal (i.e. In-order, Pre-order or Post-order) and the node where to start traversing. We also have defined three separate functions for each of the traversal types, which will be called from the traverse function based on the traversal type passed from outside.
Here is the code for traverse function:
traverse(order, node) {
  switch (order) {
    case TRAVERSAL_ORDERS.PREORDER:
      this.traversePreOrder(node);
      break;
    case TRAVERSAL_ORDERS.INORDER:
      this.traverseInOrder(node);
      break;
    case TRAVERSAL_ORDERS.POSTORDER:
      this.traversePostOrder(node);
      break;
    default:
      this.traversePreOrder(node);
  }
}
And this is the code for all three traversal methods:
//Pre-order
traversePreOrder(node) {
  if (node !== null) {
    console.log(node.value, `(${node.count})`);
    this.traversePreOrder(node.left);
    this.traversePreOrder(node.right);
  }
}
//In-order
traverseInOrder(node) {
  if (node !== null) {
    this.traverseInOrder(node.left);
    console.log(node.value, `(${node.count})`);
    this.traverseInOrder(node.right);
  }
}
//Post-order
traversePostOrder(node) {
  if (node !== null) {
    this.traversePostOrder(node.left);
    this.traversePostOrder(node.right);
    console.log(node.value, `(${node.count})`);
  }
}
In Pre-order traversal, we traverse the root node first (printing its value), then we recursively call the function to traverse its left sub-tree and then right sub-tree.
In In-order traversal, we first recursively call the function to traverse traverse the left sub-tree of the current node and then we visit the current node and lastly we recursively call the same function to traverse the right sub-tree.
In Post-order traversal, we do the opposite of the Pre-order. First recursively call the function to traverse left sub-tree, then right sub-tree and lastly we visit the root node.
There is tons of material available on internet for further readings. Questions, suggestions and corrections are welcomed :)
You can find the complete code, along with some tests on my github repo for Binary Search Tree here.
Comments